Sitecore
A streamlined approach to handling content creation in a componentized architecture coupled with multiple languages

HI is proud to partner with Formica on the recent relaunch of their Global Flagship site: https://horizontalintegration.com/2019/05/hi-goes-beyond-the-surface-for-formica. While there are many learnings to share from this complex project, one that I find helpful is outlining the steps their team used to create 100s of product pages for 31 country sites with 14 languages. As you may know, a componentized architecture coupled with multiple languages can lead to several steps to construct a page. We worked with the Formica team to come up with a streamlined process switching between the Content and Experience Editor to expedite this process. Please note this is designed for power Sitecore users and may not be applicable to all projects or authors.
- Determine your Standard Layout
With a componentized page layout, it can be helpful to have a base set of components on the page so that you aren’t starting from scratch each page build. Doing this will save the author the time of placing each individual rendering on the page. We chose to add a couple of rendering options to allow the author to remove renderings that they didn’t need as we have found it can be easier to remove components rather than add them. These rendering were then added to the template’s standard layout, so they were available when each author created a new product page.
- Create your Data Sources
Before creating a page, the authors created their page specific data sources (components) in the Content Editor. This allowed them to quickly add each product’s attributes and assets, as well as create and manage all required language versions and translations. We understand the benefit of using the Experience Editor for this task, but some users find it quicker to fill out these fields in a structured manner in the Content Editor.
- Create your Page
The author would then create their page in English or their native language (we’ll come back to language versions). After filling out the page data (meta data, navigation title, etc.), they would open their new page in Experience Editor to begin the page construction.
- Associate your Data Sources
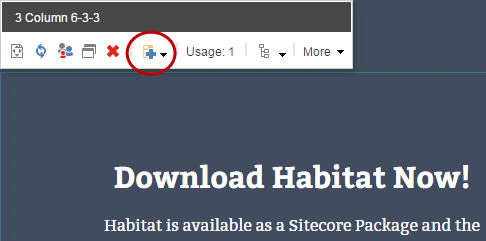
In our standard layout, along with the renderings, we added some ‘dummy’ data sources to the page. Doing this allowed the author to quickly click on the “change the associated content” control for that component and select the new data sources that they just created.

- Add the Language Version
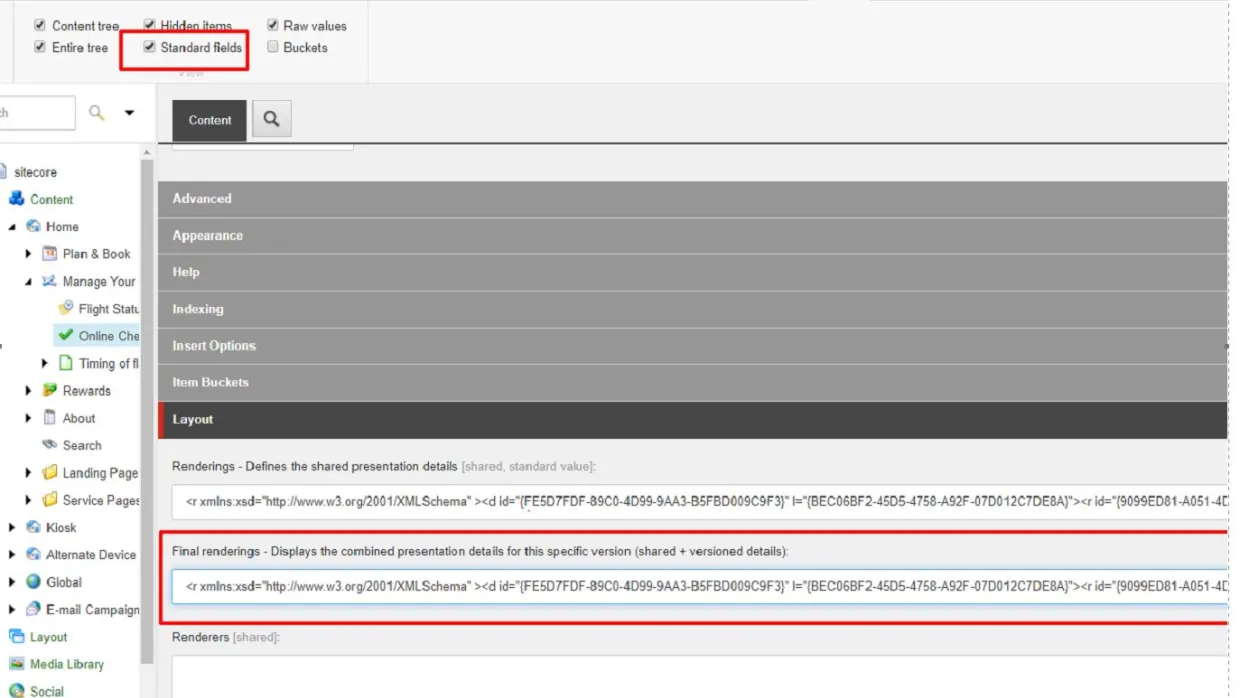
With the page fully built in their native language, it was time to the add language versions. Now if you recall each component already has its translation set up. The last step is tying those translations to the page. Our technology lead, Phani Abburi, came up with a slick way for the authors to complete this connection. Going back to the Content Editor, the author added the new language version for each page. Here is the trick, the author then copied the Final Renderings field from the page that has the associated data sources and pasted that in final renderings field for each language version. Now this is where the super user warning comes into play. To do this you will need to enable the Standard Fields to display the Final Renderings field on your page. Once you see it you can copy this line of code and paste it in each language’s field which will associate your already translated data sources with each language version. You could also check out this code that my colleague Brent Svac wrote that will also allow you to copy renderings to other language.These 5 steps greatly sped up the time it took to set up Formica’s Product pages. If you need any tips or tricks to Sitecore content creation, please contact us.